Create an Animated Car Banner using Flash CS5
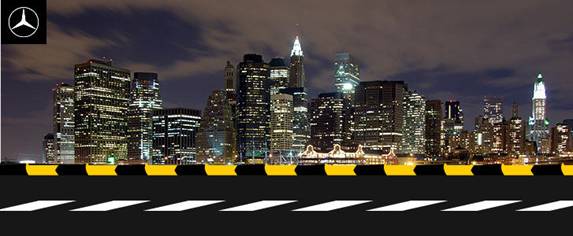
http://www.entheosweb.com/Flash/animated_banner.aspIn this tutorial, you will learn how to create an animated banner using Flash CS5. You will learn how to create a car moving on a road with its tires spinning. You can also download the free .fla file of the banner animation.
1. Open a new flash file. Choose Window > Properties from the
main menubar the PROPERTIES panel is displayed as shown in figure below

Choose the Edit button under the PROPERTIES area in the panel, the Document Settings window is displayed. Set the
dimensions as 728(WIDTH) and 300(HEIGHT) and choose the OK button to make the changes.
2. Rename
the existing layer as buildings and choose File > Import >
Import to Library from the main menubar and import the files downloaded at
the starting of the tutorial.
3. Choose Window > Library from the main menubar; the LIBRARY panel is
displayed. Pull the building images to the stage area and align it as shown in
Figure below.

4. Select
the image and choose Modify > Convert to Symbol from the main menubar
and name this movieclip as building_animation.
5. Double-click
on the movieclip and select the building image and create a moviclip again and
name it as building. Rename the layer as anim_building.
6. Select
frame 460 and add a keyframe. Select the building movieclip and open the PROPERTIES panel and se the X value to -1450. Publish the file to see
the animation. If at any point of time you find a jerk in the animation please
adjust the position and frames of the building movieclip accordingly.
7. Go
to the main stage area and create a new layer named road. Choose the Rectangle
Tool from the Tools panel and create a box at the bottom of the building
area and align it as shown in Figure below. Make sure that the color of the
road is set to #171717.

8. Next,
create a new layer named road strip and create a grey and white
rectangular pattern using the Rectangle Tool from the Tools panel, as shown in Figure below. Make sure that the length of the road strip
pattern is almost equal to that of the buildings.

9. Select the road strip and choose the Free Transform Tool from the Tools panel and distort the road strip as shown in Figure below. Make
sure that the color of the grey part in the strip pattern is similar to that
used in road.

10. Choose Modify >
Convert to Symbol from the main menubar and name it as road strip.
Select the movieclip and choose Modify > Convert to Symbol again and
name it as road strip animation. Place this animation in the center of the road
as shown in Figure below.

11. Animate the road strip
as you did for the building movieclip. But make sure that the speed of the road
strip is double as compared with the moving speed of the buildings. Publish the
flash file to see the transition in the animation.
12. Next, move back to the
main stage area and create a new layer and name it as logo. Drag the
logo.jpeg file from the LIBRARY panel and place it in the scene by first scaling
it down as shown in Figure below.

13. Create a new layer in
the main stage area and rename it as footpath. Create the footpath using
the Rectangle Tool as shown in Figure below. Make sure to match the
length of the footpath series with the road strip.

14. Align the foothpath as
shown in Figure below.

15. Animate the foothpath
similar to the road strip with the same speed. Publish the flash file to see
the effect.
16. Next, in the main
stage area create a new layer and rename it as car. Choose Modify
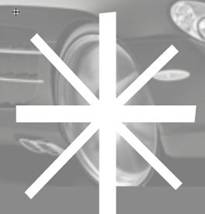
> Convert to Symbol and rename it as car. Double click on the car movieclip and create a new layer and rename it as tyre_front. Zoom in
the to the front tyre area in the screen and create a pattern using the Rectangle
Tool as shown in Figure below.

17. Make this pattern as a
movieclip and renmae it as tyre_mask. Double click on this movieclip and
rename the existing layer as bg and selec the cross pattern again and choose Modify > Convert to Symbol from the main menubar and rename it as spokes.
Choose Window > Properties from the main menubar and add blur filter to it.
18. Next, create a new
layer over it and rename it as mask. Create an oval shape exactly the
shape of the rim of the car as shown in Figure below.

19. Activate the bg layer and create keyframes at frames 3 and 6. Rotate the spokes movieclip at
frame 3 by around 180 degrees and add motion tween between the keyframes.
20. Next, activate the
mask layer and chose frame 6 and press F5 to extend the frames. Now, right
click on the mask layer and choose Mask from the drop-down list,
spokes will be visible only in the rim area as shown in Figure below.

21. Similarly, add the
same effect to the rear wheel. Move back to the main stage area and double
click on the car_animation movieclip and create a keyframe on frame
number 40. Move the car movieclip a bit in the top right position. Next, add
another keyframe at frame number 75 and place the car in the bottom right
position. Add one more keyframe at frame 115 and place the movieclip in the top
left position. Add the last keyframe on frame 190 and place the moviclip at the
same position as it was on frame1. Add motion tween between the all the
keyframes.
22. Position the car on
the main stage area as shown in Figure below.

23. Publish the flash file
to see the banner animation.
24. You can also use this
banner animation for creating an banner advertisement for mercedes benz. To do
so, create one more layer in the stage area and rename it as text and add it in
the scene and make it fly in the stage area and then stop as shown in Figure
below.

25. Publish the flash file
to get the animation as shown below.
No comments:
Post a Comment